
Asana is a powerful collaboration tool that helps your business get more productive. As you have an organization with a large team, you are constantly working on numerous projects. Which is why, it is essential that you adapt to a system that will organize your workflow and save much of your time.
We understand every business wants to collaborate effectively with their team so they can hit their targets well, but there’s a lack of coordination and system to handle multiple projects at a time.
With this concern, we want to assure you that this guide will help you understand Asana and how to use the tool effectively.
Asana is a visual collaboration tool to manage your projects effectively.
When an organization/business is unable to achieve the targets because of a lack of management system, Asana comes to its rescue.
It assists leaders in assigning tasks and managing them with a systematic approach. The tool lets you create a whole organized environment so the team can efficiently work and generate great outputs.
You will be able to assign each member a task, keep a track of them, organize lists and stages of the process, and save much of your time wasted in the manual management system.
Among hundreds of project management tools, Asana seems to catch most businesses’ attention. It is one of the amazing tools in the market that simplify task management systems.
Asana is user friendly and low maintenance. The functioning of the tool can be a little tricky for new users, but it offers the best features.
You can watch and control all your projects by assigning tasks to your team members. You need not manually communicate with them. In fact, you can also connect chat rooms with Asana for direct collaboration.
Asana lets you have a dashboard as per your convenience. You can use lists, boards, timeline, calendar as you want to go ahead with your projects.
This article is actually an ultimate Asana tutorial. I will guide you step by step on how to use Asana effectively so you can make the most out of it.
Easy to use interface
Let’s you manage tasks effectively
Allows you to integrate multiple required apps
Invite members and collaborate with ease
Receive instant notifications of actions performed on the Dashboard
Offers limited assignments
Needs good exploration for effective collaboration
Requires a steep learning curve
Not entirely free to use
The working of Asana is simple, but it requires time and exploration.
When you are ready to get started with the tool, you will have to pass a signup stage before landing up on your Asana dashboard.
Generally, all tools redirect you to your dashboard as you sign up and verify your email, but with Asana it’s different.
Here the tool will try to understand you and your work before offering you the features for project management.
The steps would look something like this
Get started with your company email address.
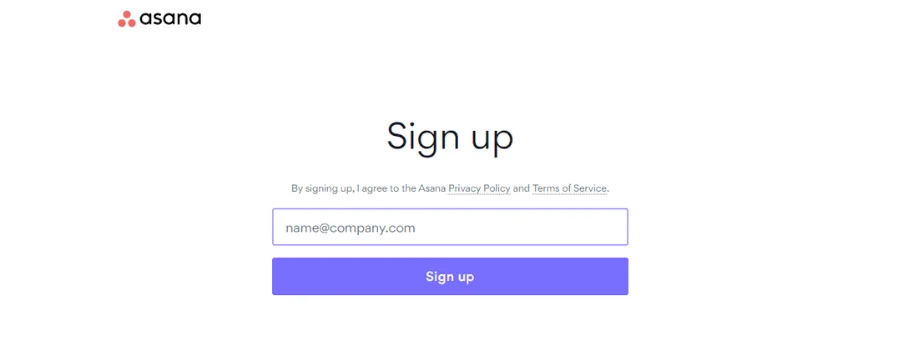
Verify your email address by opening your email app and clicking on the verification link sent by Asana
You will be redirected to a page which will look like this
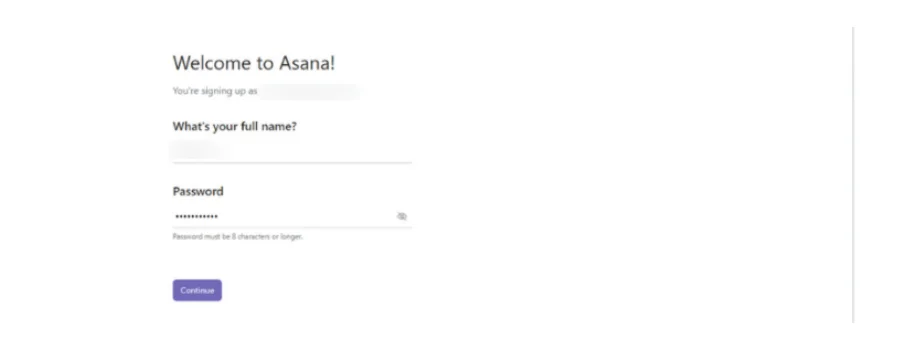
Fill up your Full Name and a password that includes
uppercase letter,
lowercase letter,
characters, and
numbers
Hit ‘Continue’
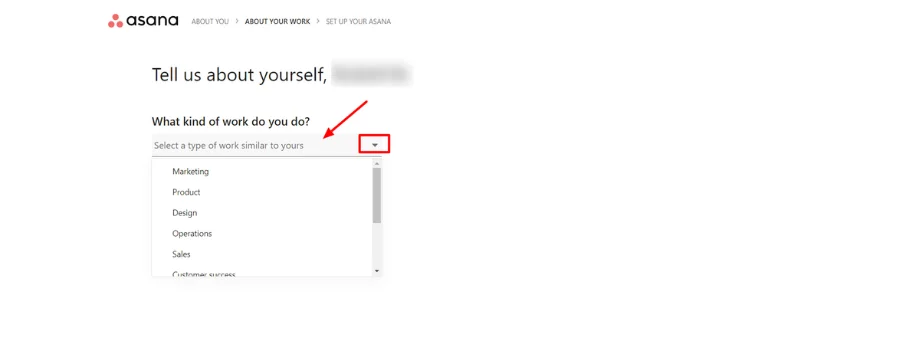
Explain about the kind of work you do.

Select the option that best defines your work. Like ‘Marketing’ if you work under ‘Sales and Marketing department’. And click on ‘Continue’
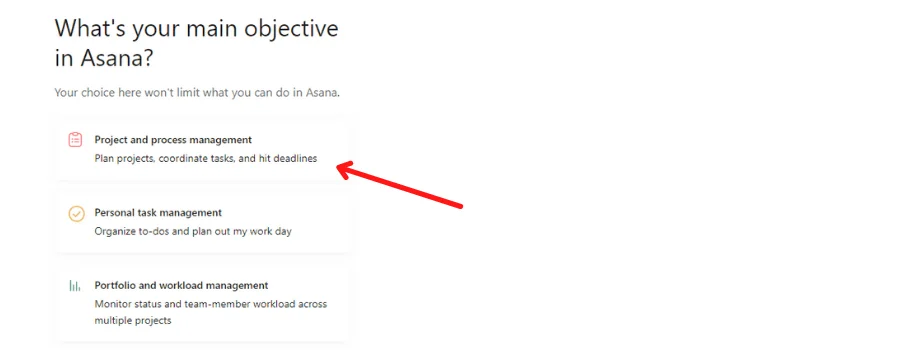
You will then be asked – why do you want to get started with Asana?
Click on the option as per your requirement and click on ‘Continue’
Then describe your current working status and click on ‘Continue’
The rest of the steps can be skipped by simply clicking ‘Continue’
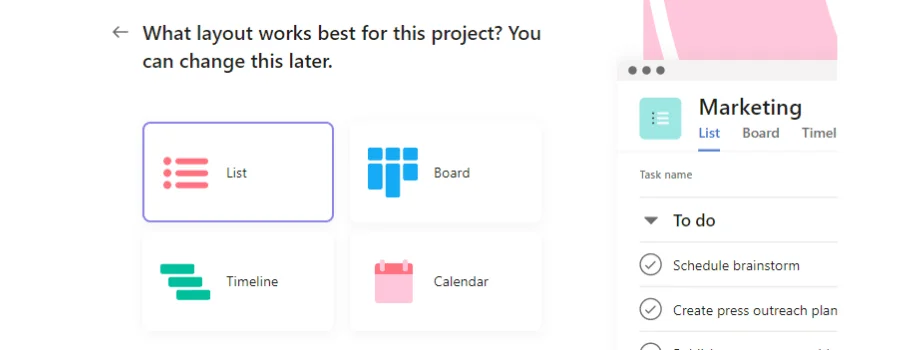
Finally, select a layout convenient for you. This is changeable in the future.
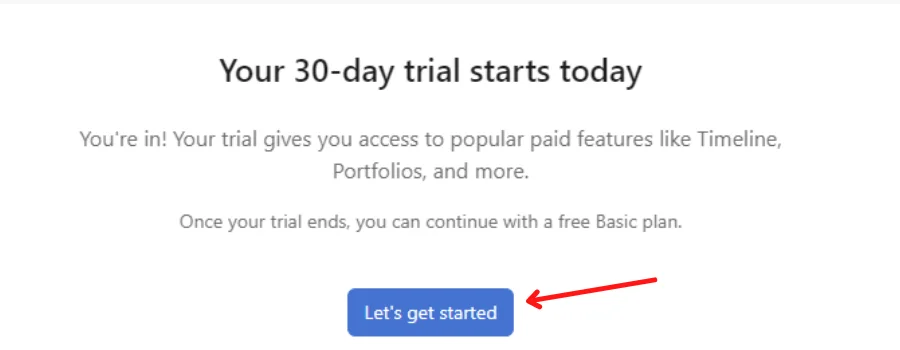
Boom! You are in and ready to explore Asana.
Because the tool is not entirely free, you can benefit from the 30-days free trial from the day of signing up.
Now you can see your Asana Dashboard! It will give you the entire work environment vibe and you would enjoy assigning and coordinating with your team over tasks.
8 Million+ Ready Automations
For 750+ Apps
If we explore various project management tools available in the market, Asana has a different approach altogether. It offers various layouts to use as a dashboard like ‘Board’, ‘List’, ‘Timeline’, and ‘Calendar’.
The task assigning features are similar in all layouts, but are differently organized. Each layout offers a different outlook towards collaboration so that businesses can choose the outlook that makes them more productive.
When you get started with Asana and explore, you will see how stages of the process are organized in each layout.
The stages of the process mean the status of a task. When you create a task, you can organize the process in stages.
Like you can first start with a ‘To-do’ stage. It will define the stage as the task created and assigned. When the assignee starts working on the same, the task can be shifted to ‘Doing’. Similarly, then ‘Done’.
Let’s say you have a digital marketing company and your work includes marketing, content creation, client pitching etc. So you can assign a To-do task as ‘Create a Social Media Grid for Client A’
When the member starts working on the task, they can move the task to ‘Doing’ then ‘Done’.
Each project requires a dedicated team to work on the specific tasks. The organization cannot rely on one team for all projects. They are bound to be divided into multiple teams for an effective collaboration.
So in that case, Asana offers a unique feature of Teams. When you get started as a business/organization, Asana lets you create teams for varied projects and add members to your business Asana profile.
But, unless they join the team, they cannot be a part of any project. That means you must invite them and they must accept the invitation for the same.
Also, you can select whether members should request to join the team or you want to invite them yourself.
Follow the instructions –
Roll your eyes to the left side bar in Asana
Check the ‘Team’ section below ‘Goals’.
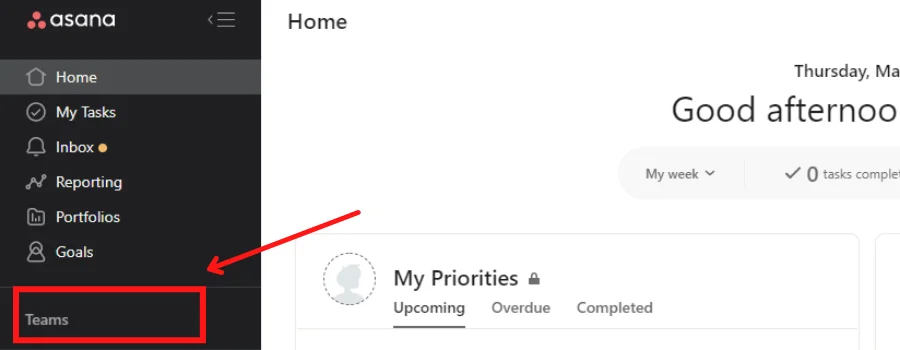
Click on the ‘Teams’. Then hit ‘Add teams’
Now edit the team details, add members, and choose team privacy types.

Finally, hit ‘Create team’
Let’s Explore the Layouts and see the steps to assigning tasks and its working.
The list layout is unique.
As you can see, the stages of the process are organized in one line on the left hand side, and all features related to tasks are organized on the right.
However, List is a little tricky to use. Unless you put your hands into it and explore for a while, you will find it difficult to use.
Under ‘To do’ can you see a few tasks set by default?
Edit them according to the kind of business you have.
Example –
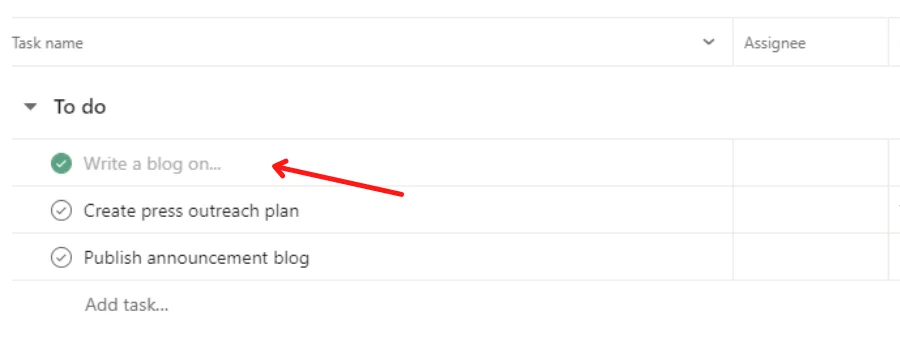
Once you edit and set the name of the Task, click enter.
Similarly, you can edit all the tasks and assign them to members as required.
But how to assign members and edit Task details using List Layout ?
Check the ‘Details’ tab on the right of each task. Here’s an example

Now click on the Details button to edit task details
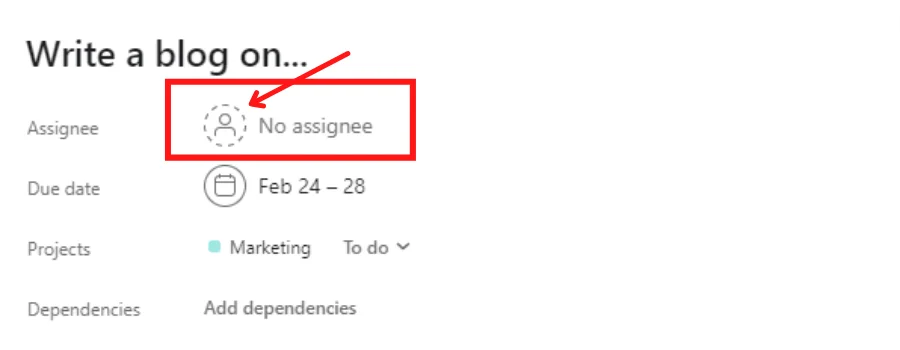
Hit ‘No assignee’ to add members to your Asana tasks with ease!
If they are already on Asana, just use their names to add. Otherwise, you can invite them via email.
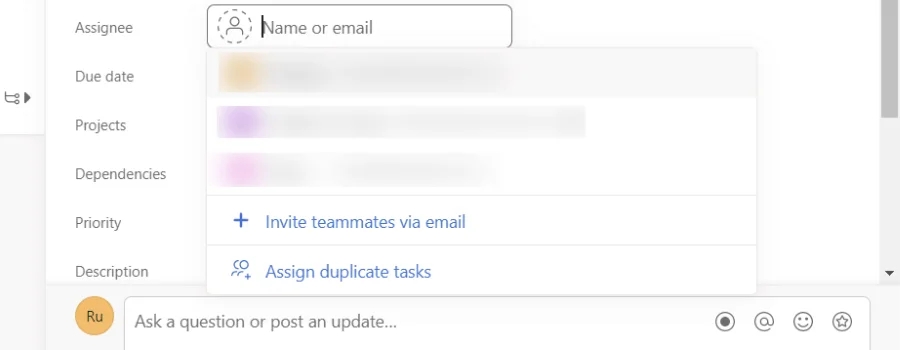
Once you add a member, they get an invitation to join. After they successfully join, you will be able to see them here
Go to ‘List’
Place the cursor on the task you want to move
Now you will see a button as such ↓
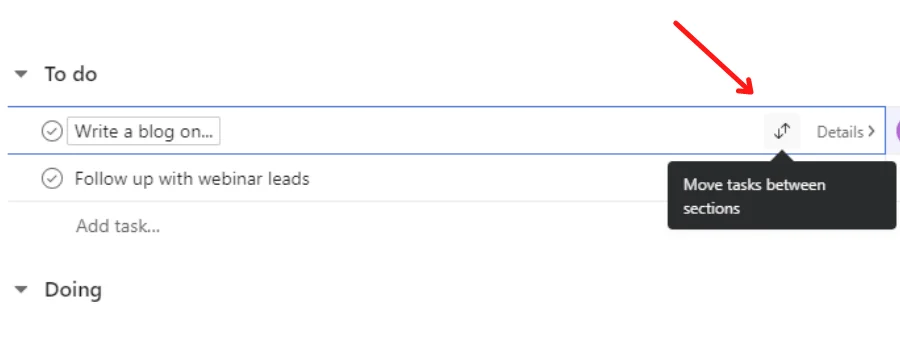
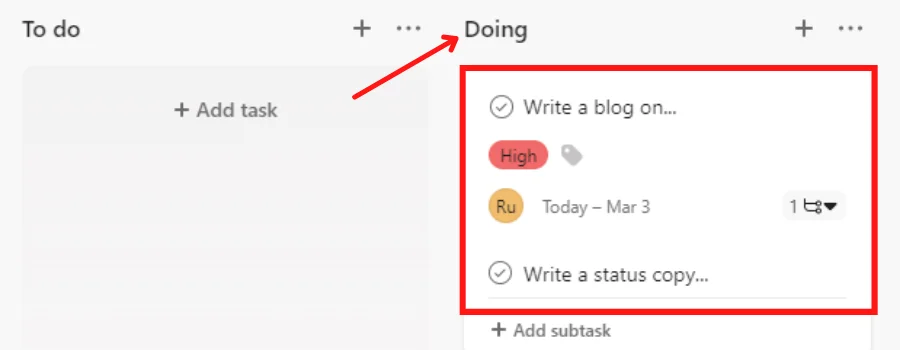
Click on the icon to move tasks between sections – To-do, Doing, and Done.
1.Check ‘Due Date’ section on the right side of tasks
Click on the tab shown below
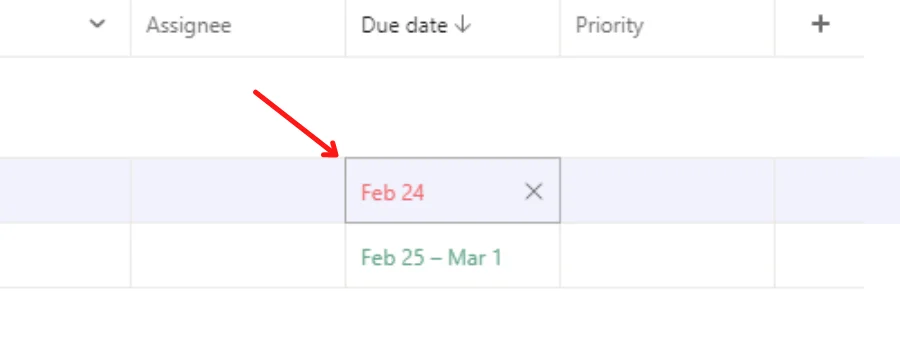
Now you will see a ‘Calendar View’
Select the ‘Start date’ & ‘Due date’
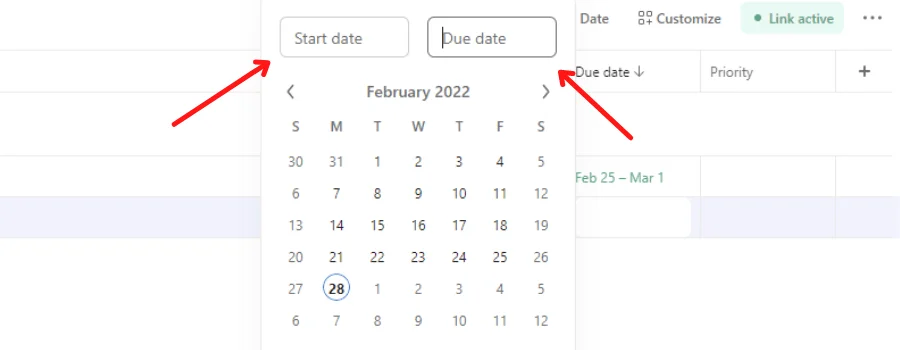
Great! It’s done. You can close the Calendar!
You can also label your tasks based on Priority levels.
Follow the instructions for the same ↓
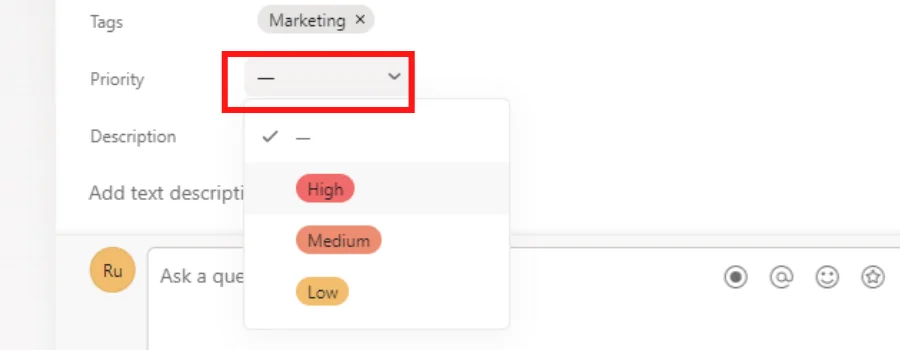
Besides the ‘Due date’ section, find the ‘Priority’ section.
Click as shown below ↓
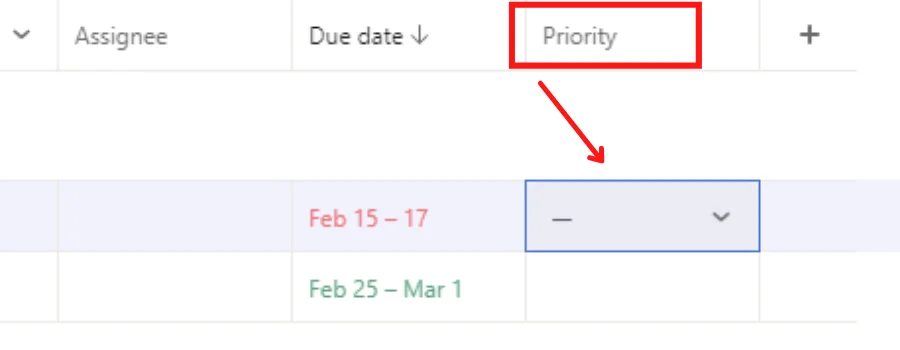
You will see a few options like – high, medium and low.
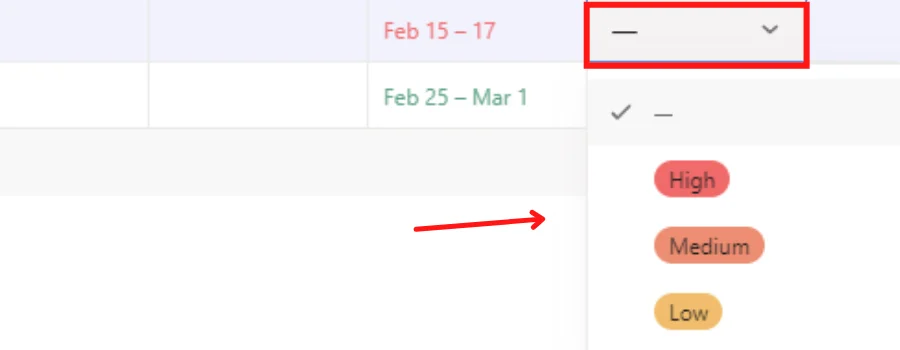
Select the required label and you are good to go!
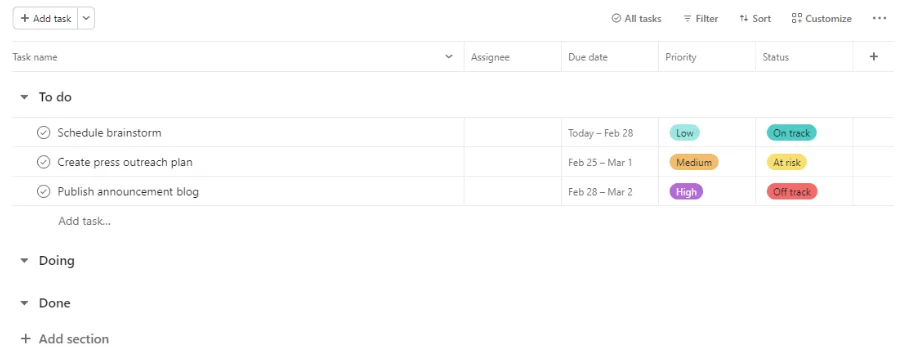
Once your tasks and actions are completed, your List Layout will look something like this
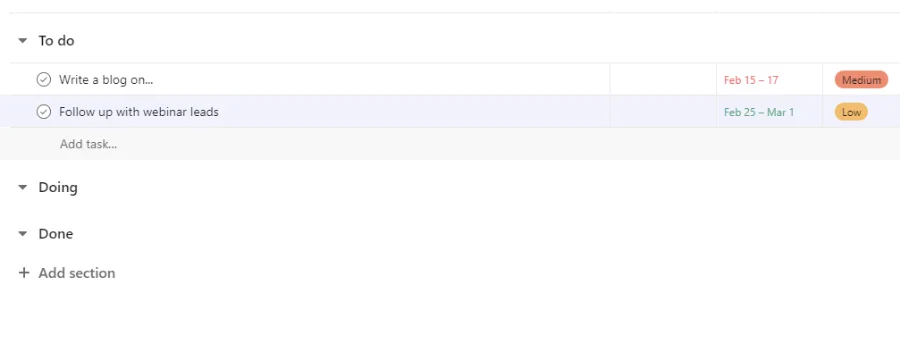
This will give you a feeling of a completely productive week, don’t you think?
You can maximize the utilization of all the features to simplify collaboration with your team and work efficiently.
Plus, you can always change, update, edit and add sections as per the kind of work you do.
Board is another layout that you can use for effective collaboration.
The features are all the same throughout the app, but it offers different layouts with different systematic approaches.
In other words, Asana lets you choose the layout that makes you feel more productive.
Here’s how the Board looks like –
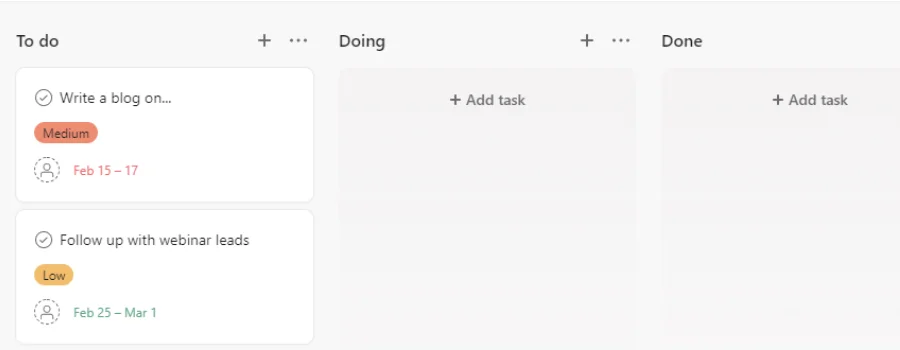
As you already know how features in List layout work, learn the ways to utilize them using ‘Board’
Unlike List, the stages of the process (sections) are placed separately one after one horizontally and are a lot easier to manage the project.
Thus, the board layout has an easy to use interface, looks more organized and lets you be efficient at work.
But how do you create and edit tasks here? Well, follow the instructions below!
Login in to your Asana.
Go to the project you are working on.
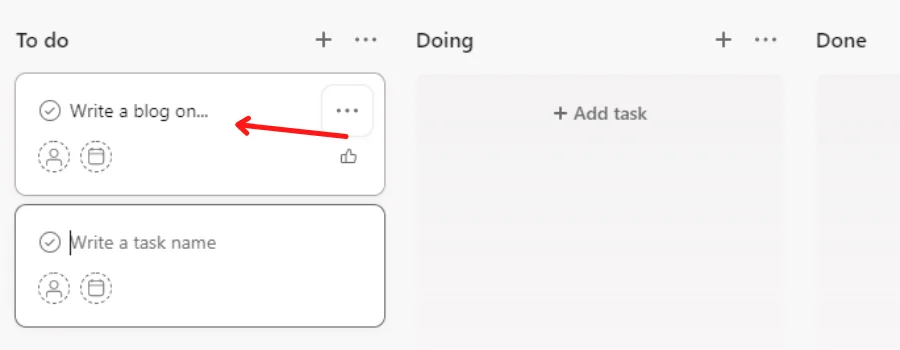
Head to Board Layout and click on ‘Add Task’ below the ‘To do’ section
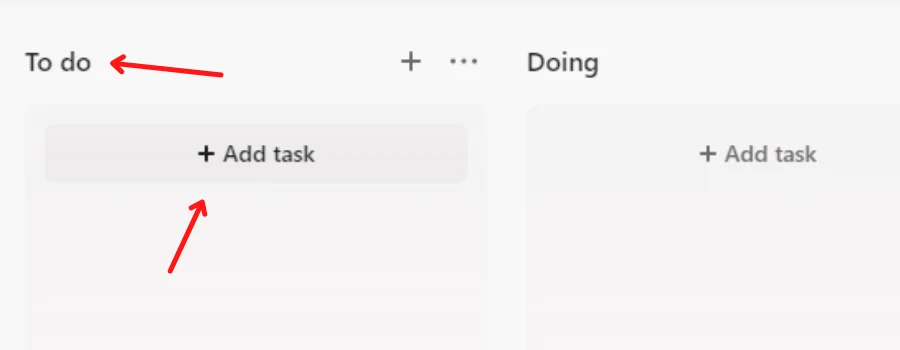
You can edit the ‘To do’ section as you want by just clicking on the section.
Here you can also have sections that say – ‘New Task’, ‘Working on’, & ‘Completed’. Aways organize your sections as per your convenience as efficiency is the aim in business.
Now name the task and press enter
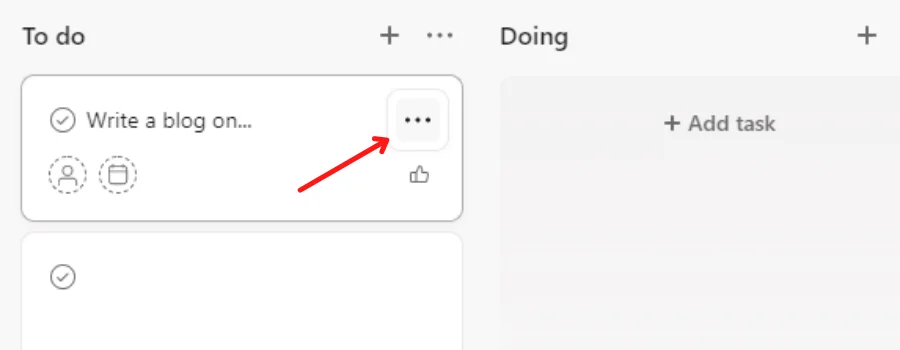
Then click on the three dots on the right side of the task box to edit task details and assign a member.
Then scroll down to ‘View details’.
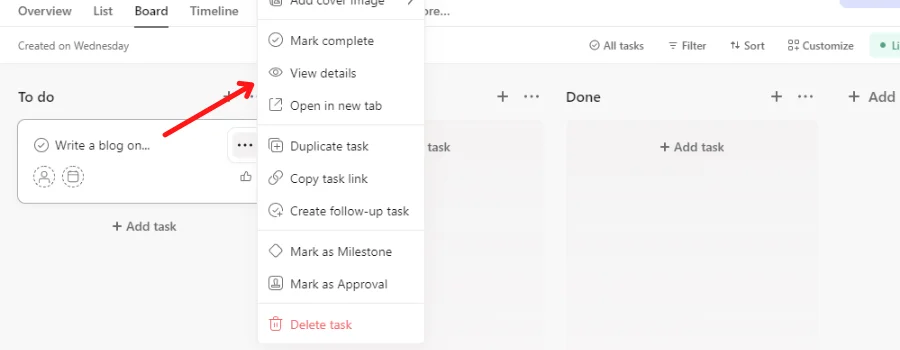
A popup will open where you will see a tab named ‘No assignee’.
Click on the tab to assign a member to the task.
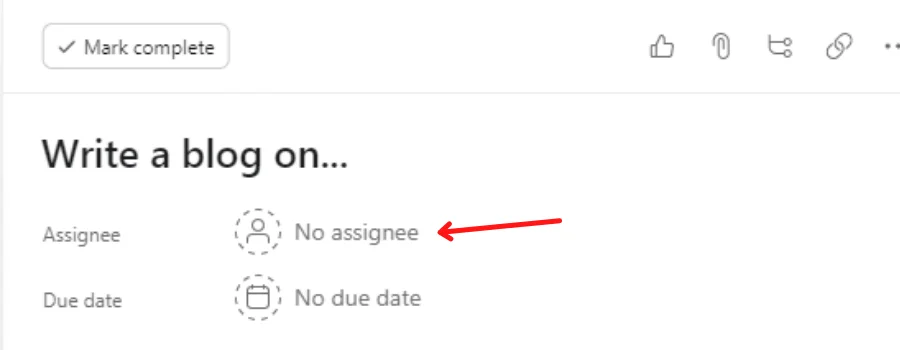
Just below ‘No assignee’ there’s a ‘No due date’ tab. Use that to assign a due date to the task.
A task also allows you to create a Sub-task. In case you have a sub-task for your teammate, you can create one from the ‘View details’ section itself.
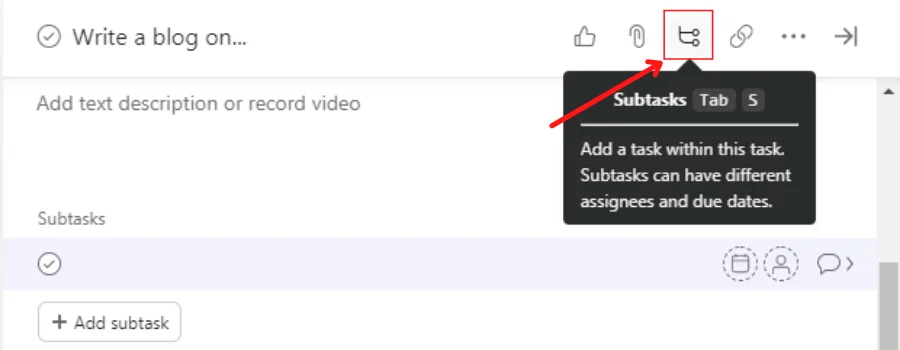
You can name the ‘Sub task’ and press enter.
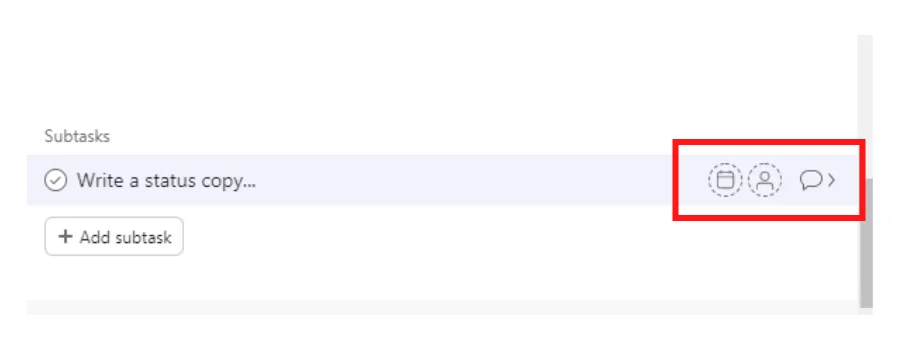
In case you want to add a due date or comment within the sub tasks, you can use these tabs ↓
Additionally, Asana lets you add attachments, links, add tags, and a lot more. When exploring the ‘View details’ section, you can go to the ‘More actions’ tab for the same.
It will look like this
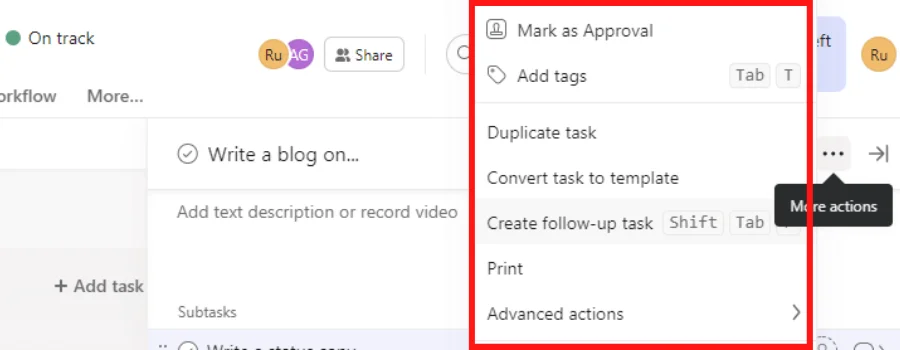
Under the ‘View details’ section, go to ‘More actions’
Scroll down to ‘Add tags’ and click on the tab.
It will add a ‘Tags’ section below ‘Dependencies’ and redirect the cursor to add one.
Type a tag that can be used to categorize projects or sections. Example ↓
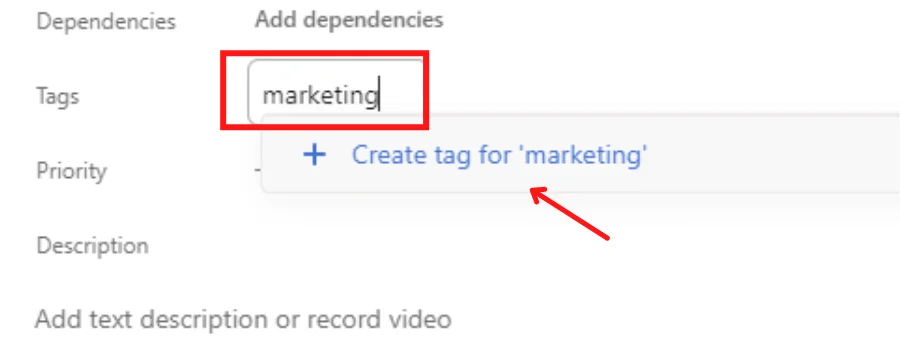
Now click on the ‘Create tag’ to add.
Just below the ‘Tags’ there’s a tab ‘Priority’.
Click on the ‘Priority’ tab and select the frequency level for the tasks. The assigned member will understand the urgency.
Asana has an amazing feature of recording videos while assigning a task.
You can record a video talking about the task in detail and give your teammates a realistic experience of working in an organization.
It is important to promote a lively and realistic environment when working closely with the members. This feature can undoubtedly help you collaborate effectively.
Here’s how you can record and post in Asana.
Go to ‘View details’ section
Scroll down to Description and click on the ‘Record Icon’
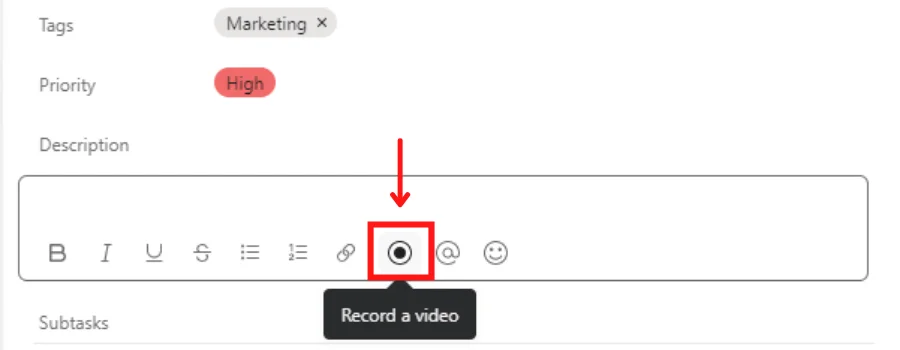
Click on ‘Record a video’ icon and you will be redirected to a popup l
You can use the options convenient to you and hit the ‘Start recording’ button.
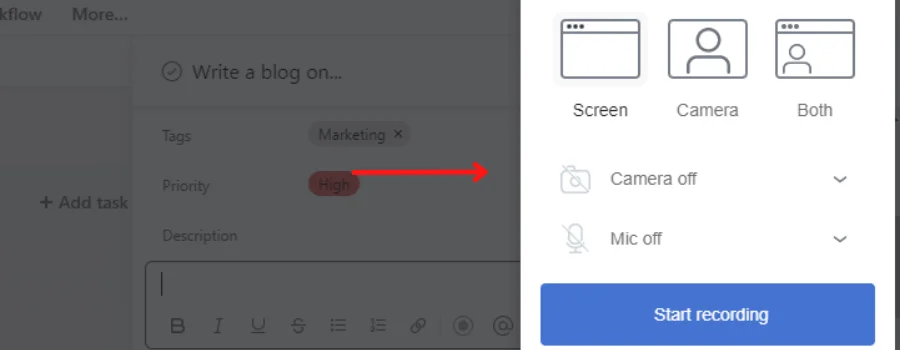
Boom! You are ready to record a short-descriptive video for your members.
A video recording is an option. In case you don’t want to utilize the feature, you can type the description.
You can also comment, and add links and emojis in the description section for more clarity of the task.
Once you have edited all the required field under task, the task would look something like this
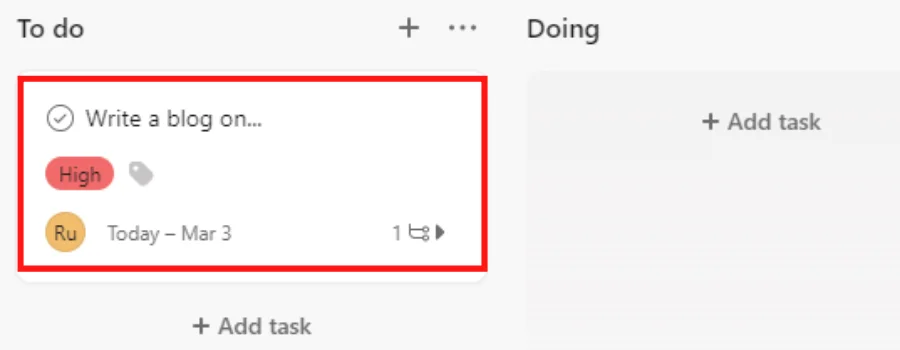
As your teammates start working on the assigned task, they can drag and drop to required sections.
Asana has really unique layouts to organize your projects well. It encourages a better approach towards collaboration.
Timeline is yet another layout you can use for managing projects and assigning tasks. The concept here is a little different from other layouts.
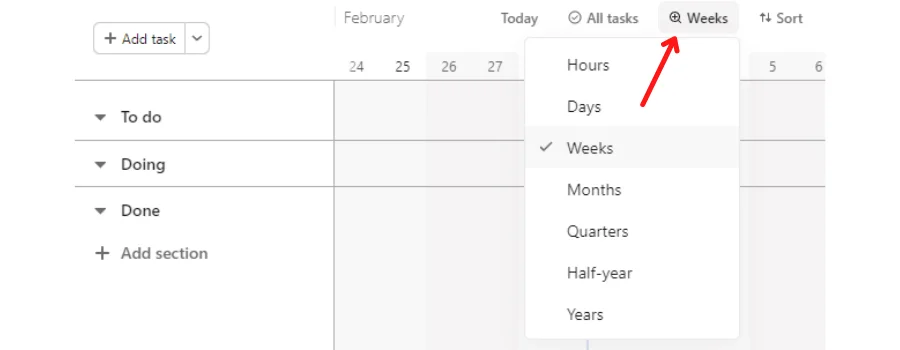
You can customize the layout as per days, weeks, months, quarters, and more.
This layout can assist you in organizing workflow according to time periods. Like you can set tasks based weekly, daily, or yearly as such.
For example, you assign a daily task of giving a call to the client. Similarly, you assign a weekly task of taking up a follow-up with the client.
Thus, for that matter, Timeline is a good layout.
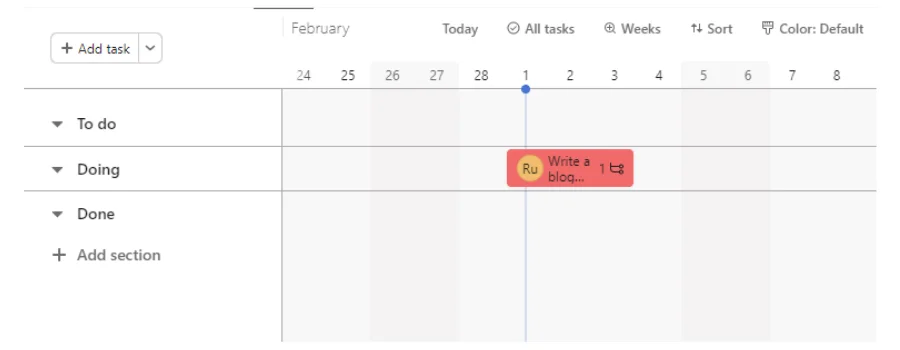
Here’s how it looks like –
And this is how you can customize the layout ↓
Go to ‘Timeline’.
Find the tab ‘Add task’ on the right below the ‘Overview’ tab.
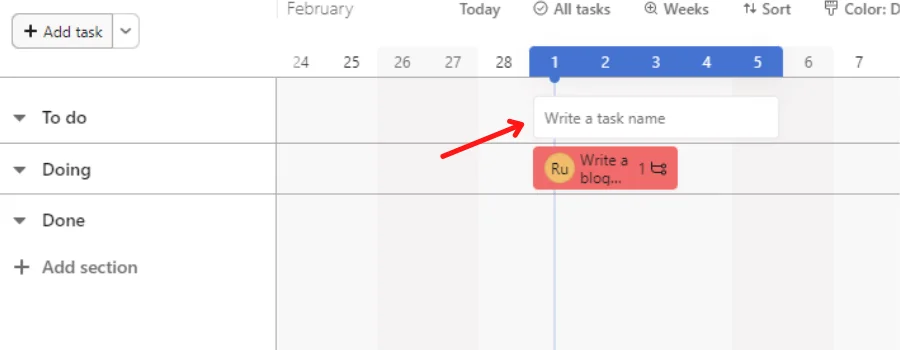
Click on ‘Add task’ and it will appear like this ↓
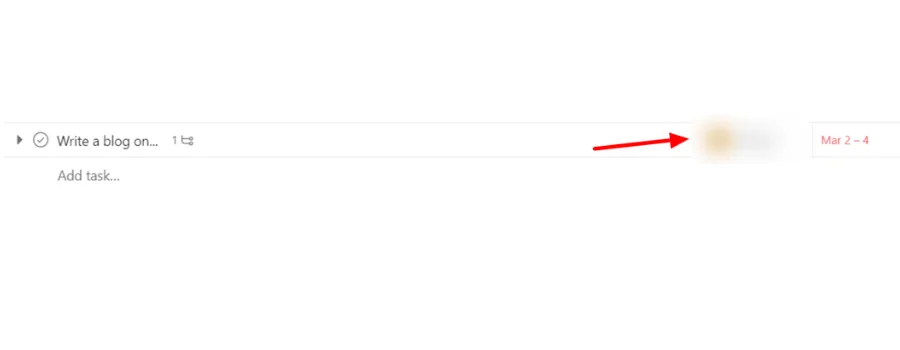
You can schedule tasks to required dates by just dragging right to left. Example ↓
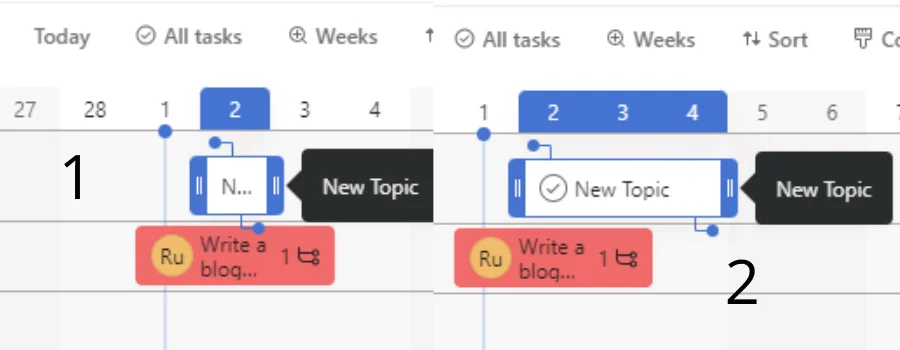
That means the task is scheduled for 2nd to 4th March, 2022. Isn’t that a great feature?
This will offer you a lot of productivity and growth.
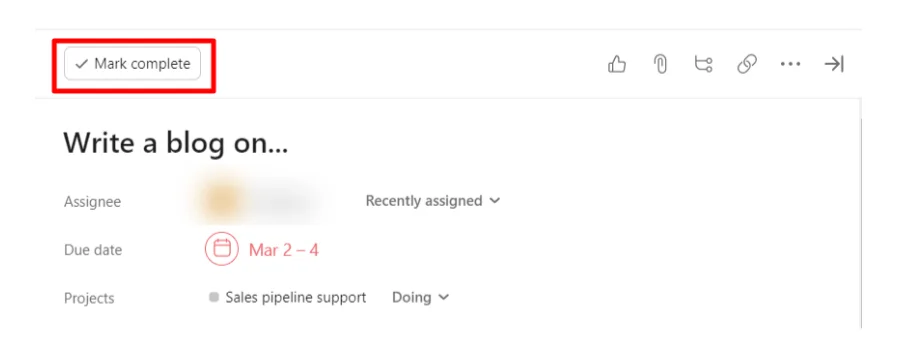
To edit the Task details, simply double tap to open the view details popup. And the rest follow the same steps as shown in List and Board Layout for adding the member, priority, description, tags, etc. as required.
Once the task is completed, you can do this ↓
Calendar view is a great way to know the scheduled tasks clearly. You can see tasks according to days and dates and be updated of dues timely.
If you are looking forward to a dashboard that is clear and crystal without manually opening the calendar and checking up with dues, Calendar layout is a good option too.
Here’s how it looks like –
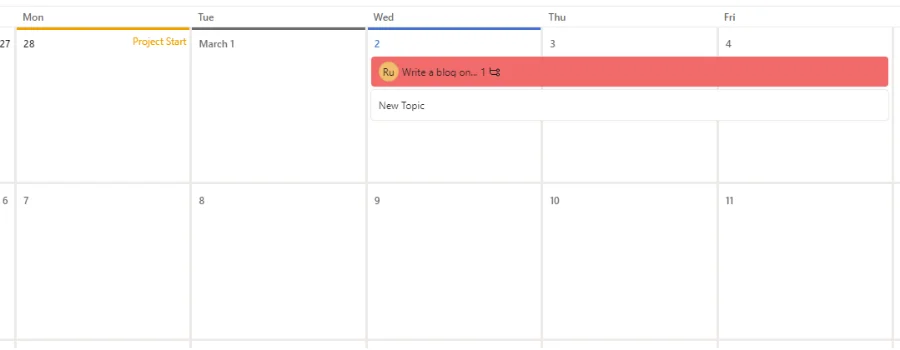
To add and edit tasks, double tap on the day you want to assign a task.
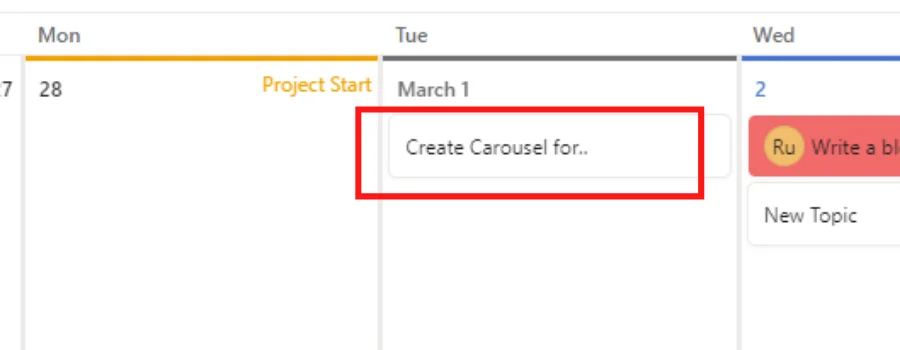
An empty box will appear like this ↓

Name the task and press enter.
Now tap the task to open the ‘View details’ popup.
Once you land up on the ‘View details’ section, the rest steps are the same for editing and assigning.
You can always add tags, priority labels, comments, and links in all layouts. Asana has made it really easy for businesses to collaborate with their team and manage the project systematically.
It is essential to keep the team updated of what, when and how things need to be done.
An overview is a layout in Asana which welcomes your team and keeps them updated of daily details, communication and lets you put the status of team progress.
Here are the key features of this layout –
Share daily updates
Share team progress through status updates
Add Milestones that the team has achieved
Send messages to members
Notify them instantly of all actions performed by you in Teams.
Being a project management tool, Asana has a wide range of amazing features that offer efficiency in work.
Although it is a premium tool and lets you enjoy only a one month trial, it has a lot more to offer in terms of a better collaboration.
Following are the features you will enjoy exploring –
Customization is a feature in Asana that offers multiple customization options. Like you can customize your field, set automation rules, connect apps, and add templates.
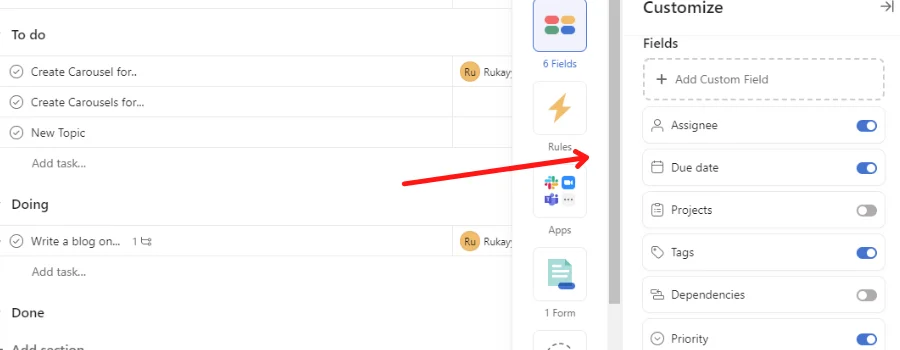
Field customization lets you add and remove a few features like tags, priorities, due dates, projects, etc.
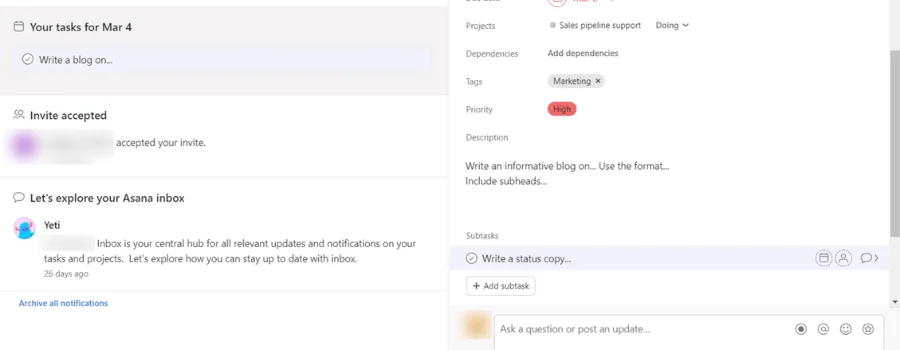
For instance, if you added tags, priorities, due dates to your layout, the layout will look like this ↓
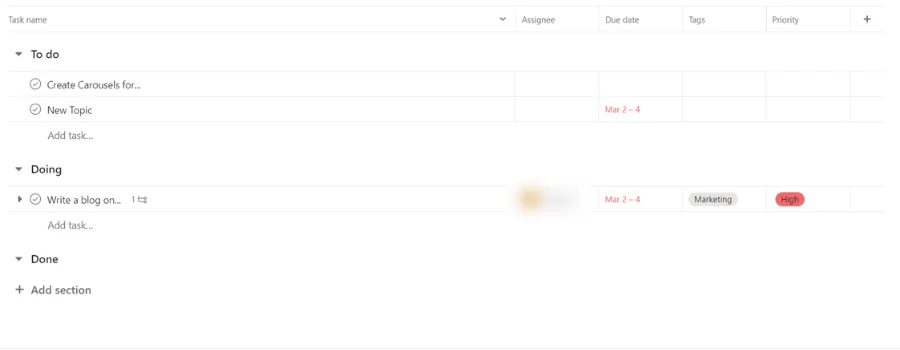
It’s a great way to organize your projects and keep an eye on every action being performed by you and your team on Asana.
You can see in the picture that the due date, and priority are clearly visible. You need not manually let your team know about them.
In fact, Asana has an amazing feature of sending instant notifications.
When you assign them a task, they will be immediately notified. Plus, Asana will update the team timely of the dues lined up without manual reminders.
These are the field customizations you can add and remove
The main purpose of adapting to the project management tool itself is a simplification in workflow.
When you switch to such tools, you will stop looking forward to manual tasks. Because time is precious and manual actions waste a lot of time that could produce better outputs.
For that matter, automations is the way to go. Whether you want to timely notify your team, collaborate through apps, or sync data, automations assist in a wider area of task management.
You can always keep an eye on your projects without actually putting your hands into it.
Like you can create a row in Google sheets when a task is being assigned to the member.
Similarly, you can automatically create sub tasks when a main task is being created or create priority level when a task is moved to a specific section.
But how do you set rules and automate workflow?
Follow the instructions below ↓
Go to ‘Customization’ on the right side of your Asana Layout.
Scroll down to ‘Rules’
It will look something like this ↓
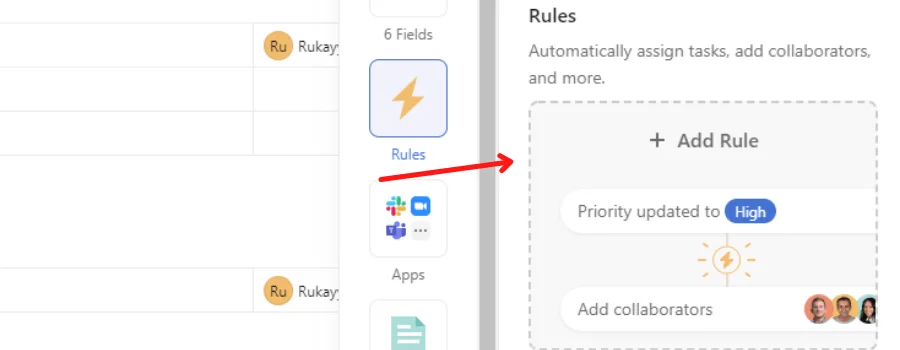
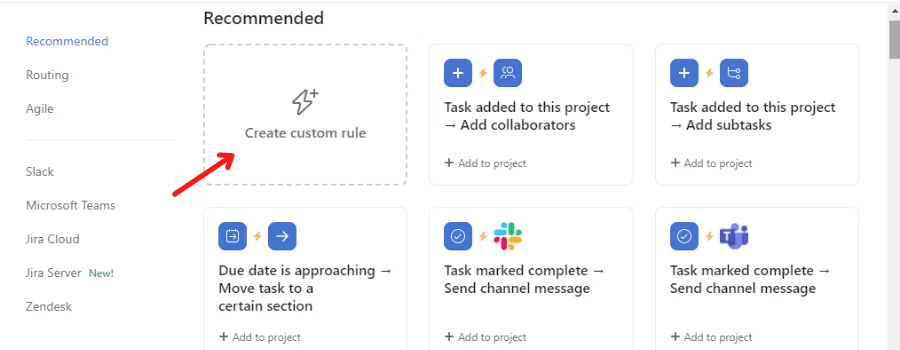
Here are the examples of rules you can create –
Asana was mainly created to simplify businesses workflow. It aims at letting businesses collaborate better with their teammates and increase productivity.
And so, it offers a few apps that you can integrate with your Asana app to automate projects and maintain a system.
Like you can connect Asana and Google sheets to sync data between the apps. Every time you assign a task in Asana, a row will be created in sheets.
Likewise, you can connect Slack and Asana to directly collaborate through the chat room. You can comment, add links and talk to your teammates from Slack directly.
Here are a few apps that Asana support –
Vimeo
Gmail
Slack
Google drive
One drive, etc
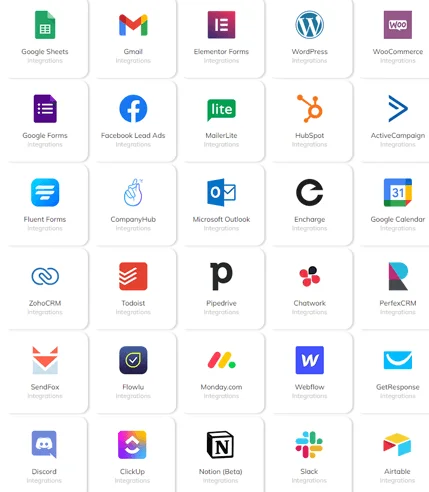
Just after the ‘Rules’ tab, you will find ‘Apps’
Click on the button to explore all apps Asana supports for integration.
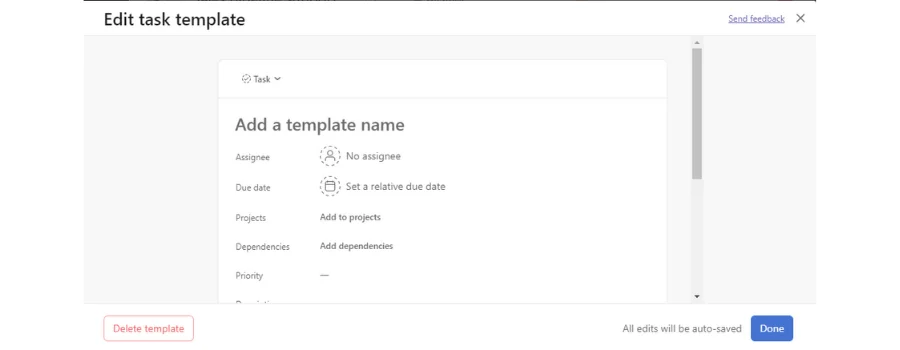
You can also create Task templates as per your preferences.
Below Apps, you will see ‘Task Templates’
Open the ‘Task templates’ customization to edit the template as you want.
Asana offers a great feature of creating custom forms to be used for surveys, lead generations, etc.
You can create a form with required fields as per the business convenience. There are multiple options available that you can add while creating the form.
Under ‘Customization’ section, scroll down to ‘Form’
Click on Form to start creating one.
Then hit done and copy the link of the form.
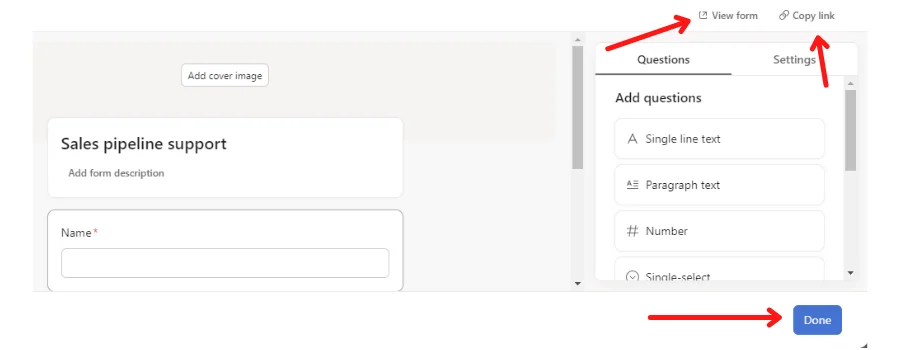
Great! You are good to go!
Even though Asana provides some native integrations, what about other applications that you want to integrate with Asana? Do you look for a developer to assist you? Certainly not!
Instead, you need an automation tool to help you integrate Asana with other applications, although if you don’t have any technical skills. This tool will assist you in connecting Asana to other apps and synchronizing data between them.
There are numerous automation tools available in the market, but Integrately is the best and most affordable option.
Integrately is a platform that provides ready-to-use Automations to help businesses manage projects more easily. Integrately has initiated a project to help businesses improve their efficiency and productivity by providing 8 million+ ready automations for 700+ apps.
In fact, it has a page dedicated specifically to Asana integration. You can choose which applications to integrate with Asana and create rules for them.
You will also be suggested rules for better understanding.
Asana has a ‘My tasks’ section on its left sidebar. Your members can hit the button to check all the tasks assigned to them.
It is essential to have a place where you can see what all tasks, messages and notifications you have received about tasks and projects.
Asana offers an ‘Inbox’, where you will receive updates of recent tasks and messages. In case you have questions or want to comment within the tasks, you can do so directly from the inbox.
You can also check the messages you have received, sent or archived.
Here’s how it looks like ↓
Keep an eye on your team from every angle using the ‘Reporting’ feature of Asana.
You can create custom charts for each status of your project like ‘Incomplete tasks’, ‘Completed tasks’, and a lot more.
Here’s how to create a dashboard for Reporting –
Go to ‘Reporting’ from the left side bar in Asana
You will be redirected to a page like this ↓

Hit ‘Explore charts’ to check the templates and go for the one most convenient for your business.
And boom you are ready to have a ‘Reporting’ dashboard of charts using real-time data across teams, projects—even departments.
Asana also aims to encourage and motivate the organization to manage projects smoothly. Just so they can receive great outputs. That is why it lets you set a company goal and stay inspired.
The step to creating a goal is simple – just find the ‘Goal’ tab in the left sidebar.
Then hit the ‘Add company goal’ button.
Now edit the details required and hit ‘Save’.
Asana is undoubtedly an incredible task management tool. It offers a wide range of features and customization options for effective collaboration between the team.
Here are the key features that promotes better collaboration –
Teams
Overview dashboard
Layout
Workflow
Customizations
Status updates
Message team members, etc


