Hello, marketers and data enthusiasts! Get ready to enter the amazing world of Gravity Forms and Salesforce Marketing Cloud integration. In this article, we’ll show you how to harness this wonderful connection to boost your marketing game.
You might be wondering what you’ll gain by integrating these tools. Well, let me share the secret with you.
Gravity Forms is like a hero that helps you create forms easily, while Salesforce Marketing Cloud is a power that helps you manage customer relationships and targeted marketing.
When you integrate them, you create a superhero that boosts your marketing efforts and brings you closer to your customers.
Here are Some Advantages of Connecting Gravity Forms + Salesforce Marketing Cloud
💪Boost Your Lead Generation – You can seamlessly transfer Gravity Forms leads to Salesforce. This means you can nurture them with targeted campaigns and convert them into loyal customers.
💪Personalize Your Marketing – The data you collect through your forms becomes the secret ingredient for your customised marketing campaign.
Imagine every lead that comes through your forms gets automatically captured and sent to Salesforce Marketing Cloud. This means no more manual data entry or lost leads. Plus, It’s a time-saving enchantment that allows you to focus on nurturing those leads and growing your business.
Find all the powerful ways to connect Gravity Forms + Salesforce Marketing Cloud or create your own integration in clicks.
Gravity Forms is a digital magic that allows you to design beautiful forms without breaking a sweat. Its user-friendly interface makes it easy to create forms, whether they are simple contact forms or complicated surveys.
But how does this enchanted gadget do its work?
▶️After you’ve created your masterpiece, you can embed it on your website or share it with a simple link.
▶️When users complete the form, their information is gathered and securely kept.
▶️Gravity Forms also has tools for customising notifications, redirecting users to specific pages, and even enabling conditional logic to show or hide fields.

Integrate Gravity Forms With 750+ Apps In 1 Click
No Learning Curve. Built For Non-techies.
Now, let’s shift our gaze to the mighty Salesforce Marketing Cloud, a world of limitless marketing possibilities. At its core, Salesforce Marketing Cloud is a robust platform that enables you to manage customer relationships, create targeted campaigns, and track their performance.
▶️You can harness the power of customer data to build personalized journeys for your audience.
▶️Allows you to segment your contacts based on various criteria, such as demographics, behaviours, or preferences.
▶️Armed with these insights, you can create captivating email campaigns, social media ads, and mobile messaging that resonate with your customers on a deeper level.

Integrate Salesforce Marketing Cloud With 750+ Apps In 1 Click
No Learning Curve. Built For Non-techies.
Ah, Integrately, the mystical bridge that connects various tools and unlocks their combined potential. This remarkable platform acts as a channel between Gravity Forms and Salesforce Marketing Cloud, enabling them to communicate effortlessly.
It offers a vast library of pre-built integrations, allowing you to effortlessly connect these two with a few clicks. No complex coding spells are required!
Furthermore, the platform provides customization options, allowing you to tailor the integration to your specific needs.
You can choose when and how data is synced, set up conditional workflows, or even add filters to fine-tune the integration.
Now that we understand the powers of both Gravity Forms and Salesforce Marketing Cloud, let’s uncover the secret to converting them into a harmonious marketing symphony.
Step 1 – Go to Integrately and sign up
Step 2 – Search for Gravity Forms as your first app

Step 3 – Now search for the Salesforce Marketing Cloud app

Step 4 – Now choose the 1-click automation to get started with

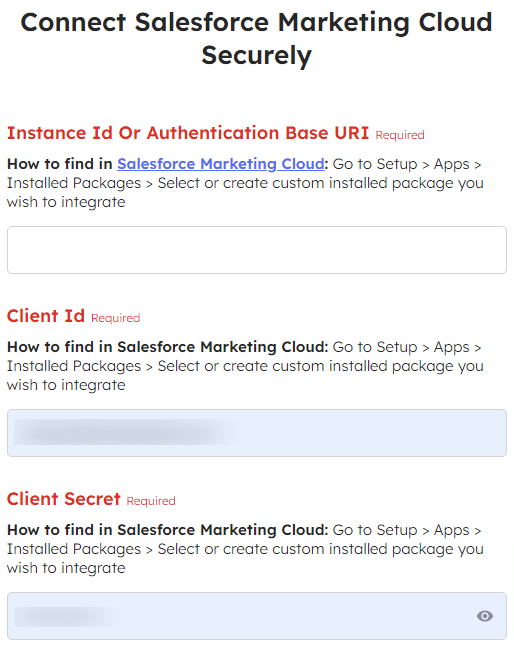
Step 5 – Connect both of your accounts using the details required


Step 6 – Once connected, map the field as needed
Step 7 – Now test your automation and make it live!
8 Million+ Ready Automations
For 750+ Apps